iTerm2 + Oh-My-Zsh + PowerLevel10k
Do you want the terminal on your Mac to look like this? If yes, then follow this article on how to configure your terminal.
The image of the terminal shown above is of iTerm2, configured to use the Oh-My-Zsh framework and PowerLevel10K theme. This article will guide you through all the steps to configure your macOS terminal to have this visual effect.
Read More: You can read more about Oh-My-Zsh in this link.
Install iTerm2
We will use brew to install iTerm2.
Read More You can read about Homebrew and how to install it on your Mac here.
brew cask install iterm2
Installing Oh-My-Zsh
Prerequisites
You need to have a zsh-shell installed in your system. To check which zsh version you have, type the following command -
zsh --version
You should be able to see the version of the zsh-shell version you have on your system. Example output -
zsh 5.7.1 (x86_64-apple-darwin19.0)
If you don’t have zsh installed, you can install it on your Mac as follows -
- Install zsh -
brew install zsh - Make zsh your default shell by typing the following command -
chsh -s /usr/local/bin/zsh
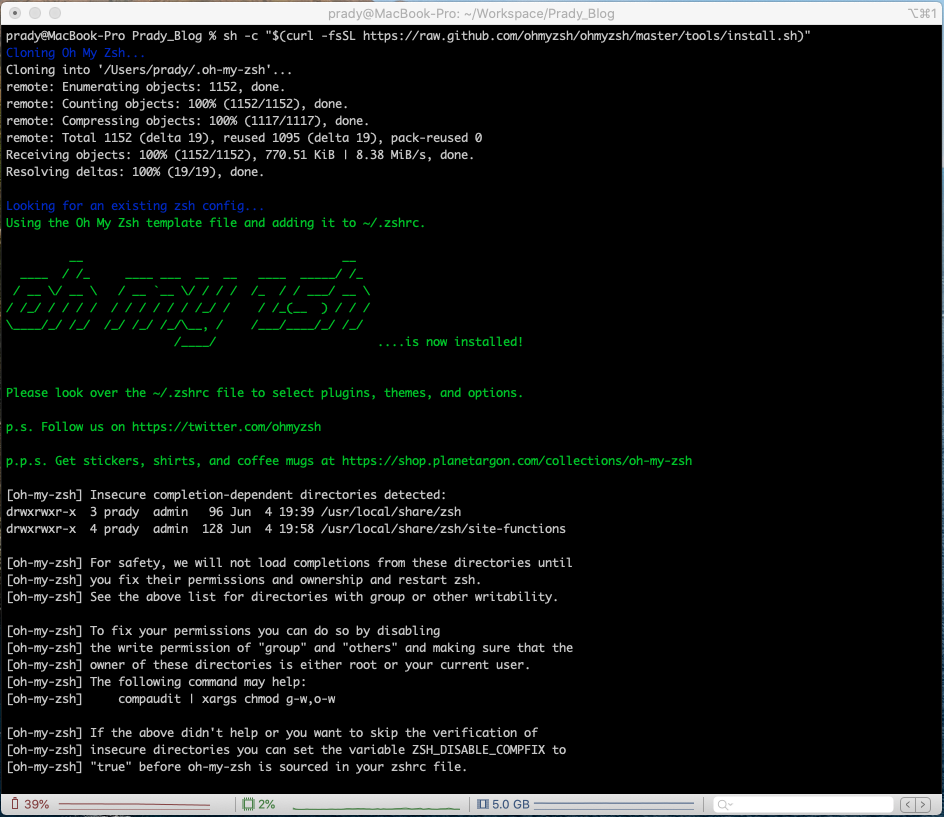
Install Oh-My-Zsh
You can install Oh-My-zsh using either curl or wget.
curl command
sh -c "$(curl -fsSL https://raw.github.com/ohmyzsh/ohmyzsh/master/tools/install.sh)"
wget command
sh -c "$(wget https://raw.github.com/ohmyzsh/ohmyzsh/master/tools/install.sh -O -)"
Read More: If you want to read about the differences between curl and wget, you can read this blog by Daniel Stenberg.
You should see a screen like the image below after running the above command -
Now, lets change the default theme. Type the below command in your terminal to open up the .zshrc file for editing -
nano ~/.zshrc
This file should look something like this -
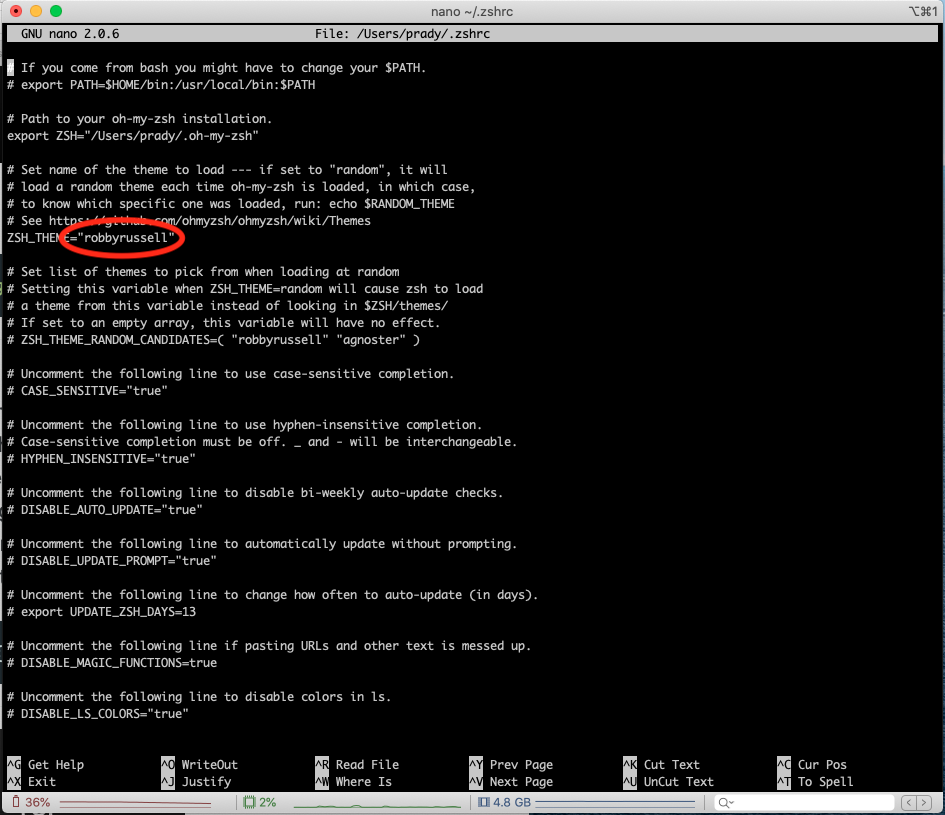
The red circle in the image is where the default theme is defined. We will now update it to PowerLevel10k theme. But before that, you need to download the PowerLevel10k theme since it doesn’t come by default with Oh-My-Zsh.
Installing PowerLevel10k
- Type the following commad in your terminal -
git clone --depth=1 https://github.com/romkatv/powerlevel10k.git ${ZSH_CUSTOM:-~/.oh-my-zsh/custom}/themes/powerlevel10k - Open the .zshrc for editing by typing
nano ~/.zshrc - Remember the ZSH_THEME highlighted in the image above? Update it to Powerlevel10k as follows -
ZSH_THEME="powerlevel10k/powerlevel10k" - Save and exit the nano editor and type again
source ~/.zshrcagain for the zsh shell to pick up the changes. - Quit iTerm2.
QuickTip: Shortcut-Keys to Quit iTerm -> command+q
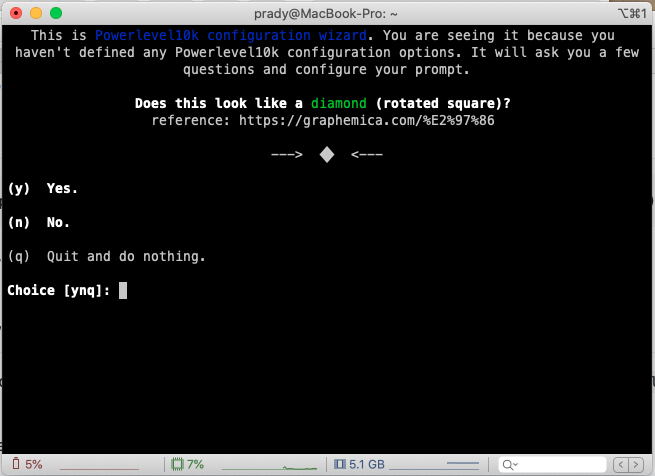
Configure PowerLevel10k
Configuring PowerLevel10k is pretty straight forward. When you reopen iTerm2, you should be taken directly to the screen for configuring PowerLevel10k. If the interactive configuration doesn’t show up, type p10k configure to bring the interactive configuration wizard. You can use p10k configure at any point of time to reconfigure the theme.
NOTE: PowerLevel10k requires Meslo Nerd Font patch, so please be sure to accept as ‘y’ when prompted.
While navigating through the interactive window, select the options based on your liking and configure it.
This is an example window of the interactive window -